Task Scheduling
This feature allows users to easily add and manage tasks, creating complex workflows. Through an intuitive interface, users can define detailed file processing rules and select specific handling methods, ensuring that each task executes the intended operation precisely. Additionally, file filtering properties can be associated, allowing tasks to intelligently filter and process files based on specific conditions.
Add Task: Users can create new task entries, specify task names, descriptions, and other metadata to organize and identify different workflows.
Task Scheduling: Provides powerful scheduling capabilities, where users can arrange task execution sequences through drag-and-drop or by setting dependencies to build complex workflows.
Define File Processing Rules: Set detailed rules for each task, including file types, paths, size limits, etc., ensuring that only files meeting the criteria are processed.
Choose File Processing Methods: Select the most suitable file handling methods according to needs, such as move, copy, rename, convert format, and configure conflict resolution strategies.
Associate File Filtering Properties: Apply advanced filtering conditions, such as date ranges, keyword matches, metadata tags, etc., to further refine the selection of target files, improving processing accuracy and efficiency.
Add Task
Steps
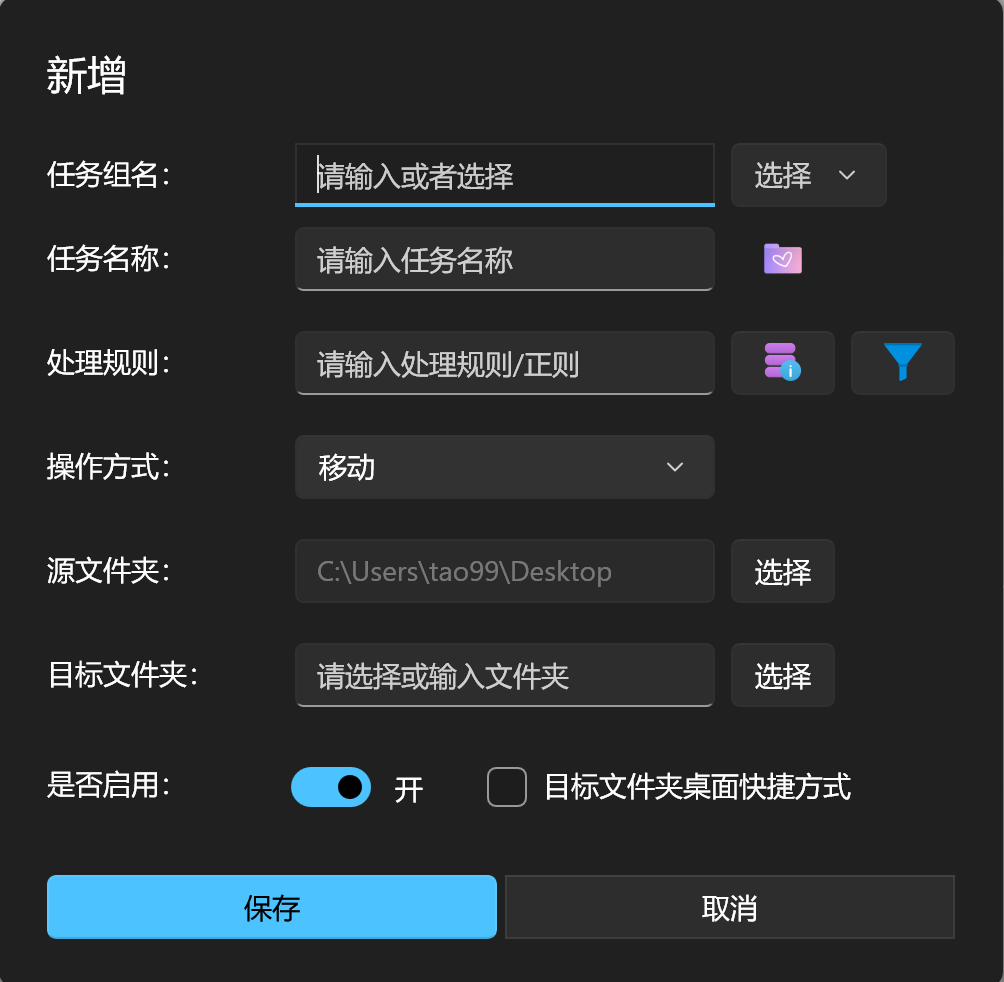
Click the "Add Task" Button:
- Find and click the "Add Task" button in the main interface to start creating a new task.
Display Add Task Interface:
- After clicking the "Add" button, a simple and user-friendly "Add Task" dialog will pop up.
Fill in Task Information:
- Task Name and Group Name: Users can input the task name and group name for easy identification and management.
Set File Processing Rules:
- Processing Rules: Define detailed file processing rules, such as file extensions, regular expressions, specific character matches, etc. You can either enter custom rules or select preset rules by clicking the purple button next to the input field. Multiple rules should be separated by
;or|. For more details, refer to the Rules Configuration Section. - Additional Rules: Click the blue "funnel" icon to select filter rules added in the Filter Section, which will be associated with this task and combined with the processing rules with an "AND" relationship.
- Processing Rules: Define detailed file processing rules, such as file extensions, regular expressions, specific character matches, etc. You can either enter custom rules or select preset rules by clicking the purple button next to the input field. Multiple rules should be separated by
Choose File Processing Method:
- Move: Move files from the source folder to the destination folder, preserving the file structure and name.
- Copy: Copy files to the destination folder, keeping the original file structure and name.
- Rename: Copy files to the destination folder and rename them according to the defined rules, while maintaining the file structure.
- Recycle Bin: Move files to the system recycle bin, allowing recovery before the bin is cleared.
- Delete: Permanently delete files, without recovery options. Please use with caution.
- Extract: Automatically extract compressed files. By default, files are extracted in the source folder. For single files, they are extracted to a folder with the same name as the archive. For multiple files without a root directory, they will also be extracted into a folder with the same name as the archive. If the file rule doesn't match a compressed file format, the program will search and extract all compressed files in the source folder, extracting only the files that meet the rule.
- Compress: Compress files into a ZIP file. The archive's name will match the source file, the archive's path will be the same as the source file, and its size will equal the source file's total size.
- Upload to WebDAV: Automatically upload matching files to a configured WebDAV server.
- Hard Link: Create a new link to the original file within the same file system. Both links share the same physical data, and changes made to one will reflect in the other.
- Symbolic Link: Create a symbolic link to the original file or directory. This type of link can span file systems, but if the original file is deleted, the link will be broken.
- File encryption: File encryption provides two methods: 1) 7z compressed file encryption, to create an encrypted compressed file; 2) AES-256 combined with PBKDF2 derived key encryption, which can be decrypted with commonly used tools like OpenSSL, ensuring a high level of security and compatibility.
- File Snapshot: Captures and exports a complete hierarchical file and directory structure of a hard disk drive as an HTML formatted snapshot document.
Specify Source and Destination Folders:
- Source Folder: Select the folder containing the files to be processed.
- Destination Folder: Specify where the processed files should be stored. Users can browse and select or manually enter the path.
Advanced Options:
- Create Desktop Shortcut: Users can choose to create a desktop shortcut for quick access to the task.
Save and Apply:
- After completing all settings, click the "Save" button to confirm the configuration and activate the new task. The task can now be automated in the Automation Section.
Task Priority
After adding tasks, all tasks will have the same priority by default and will be executed in the order they were added. If you wish to customize the priority of tasks, you can simply drag and drop tasks in the task list to reorder them. This allows important tasks to be processed first.
This feature provides flexible task queue management, ensuring that critical tasks are executed in a timely manner while maintaining an intuitive and convenient user interface.
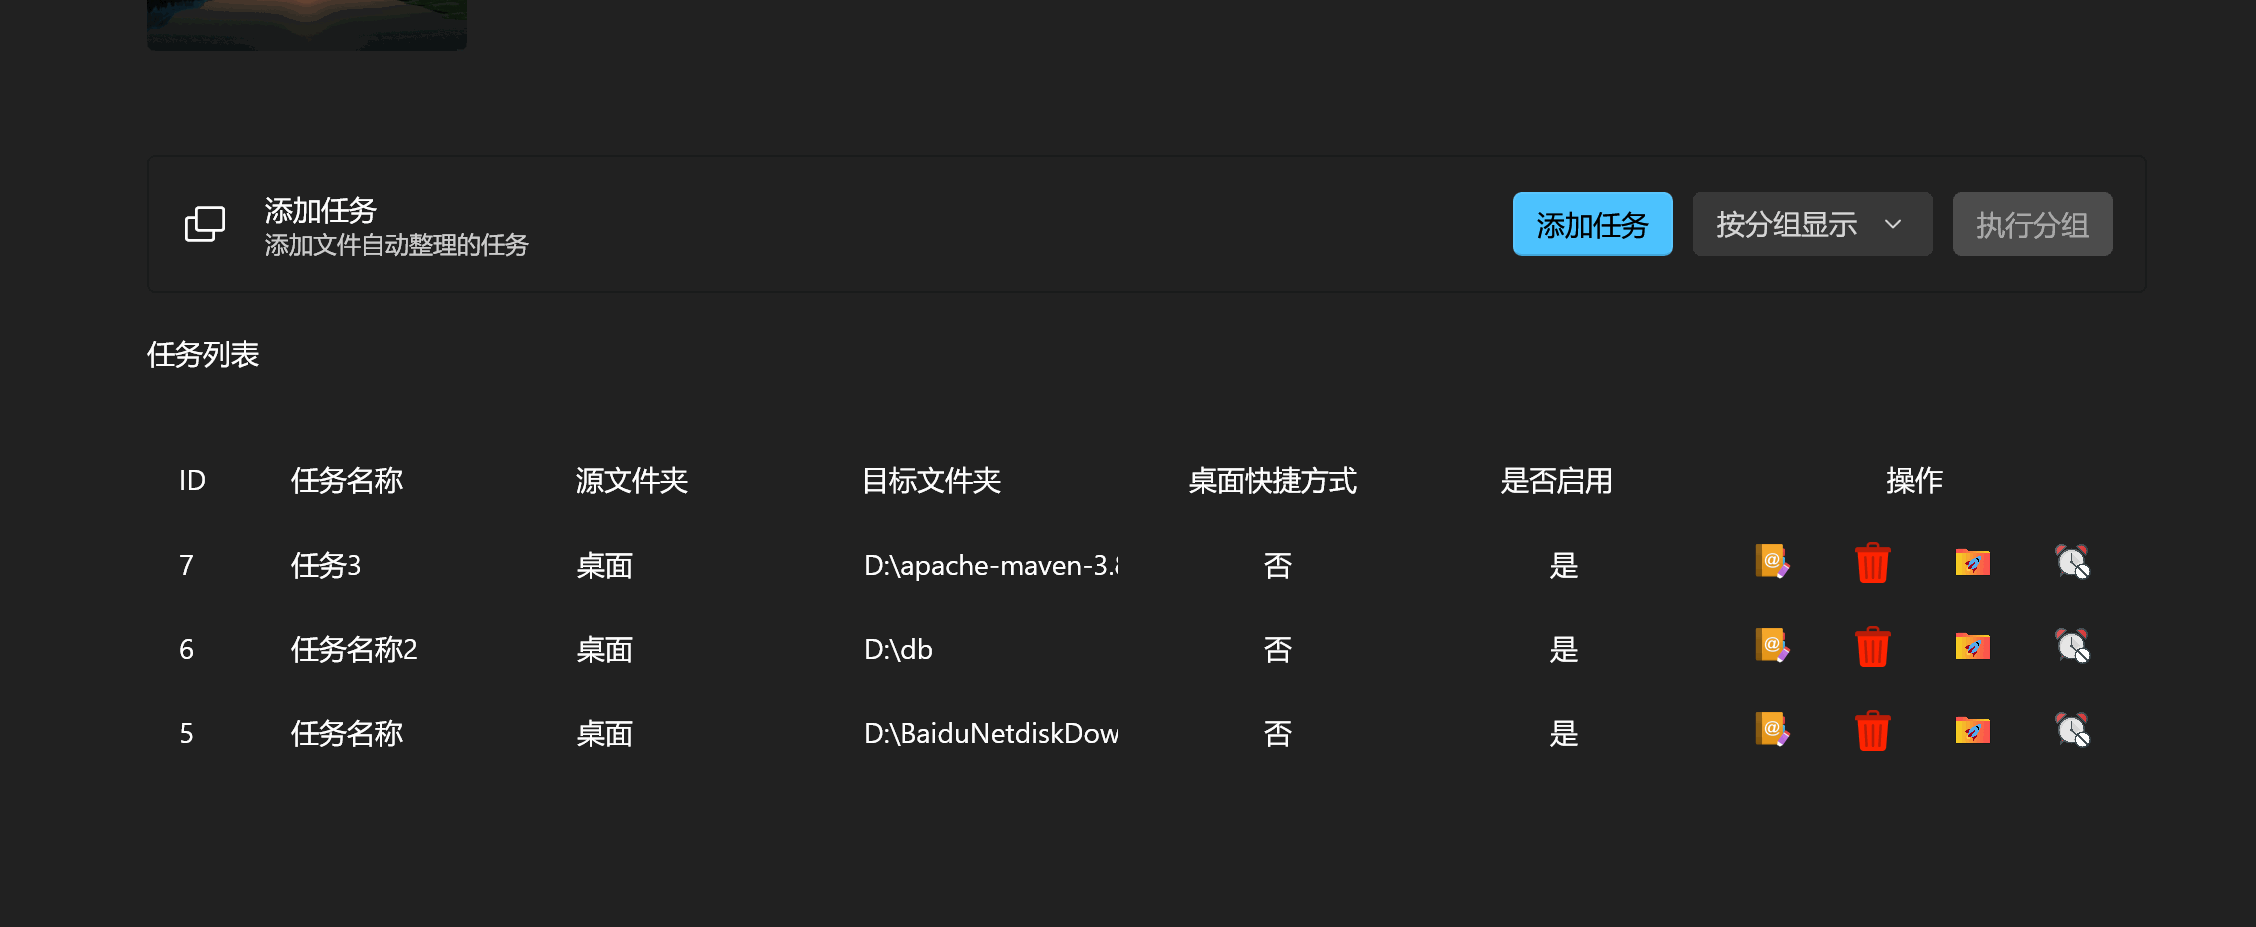
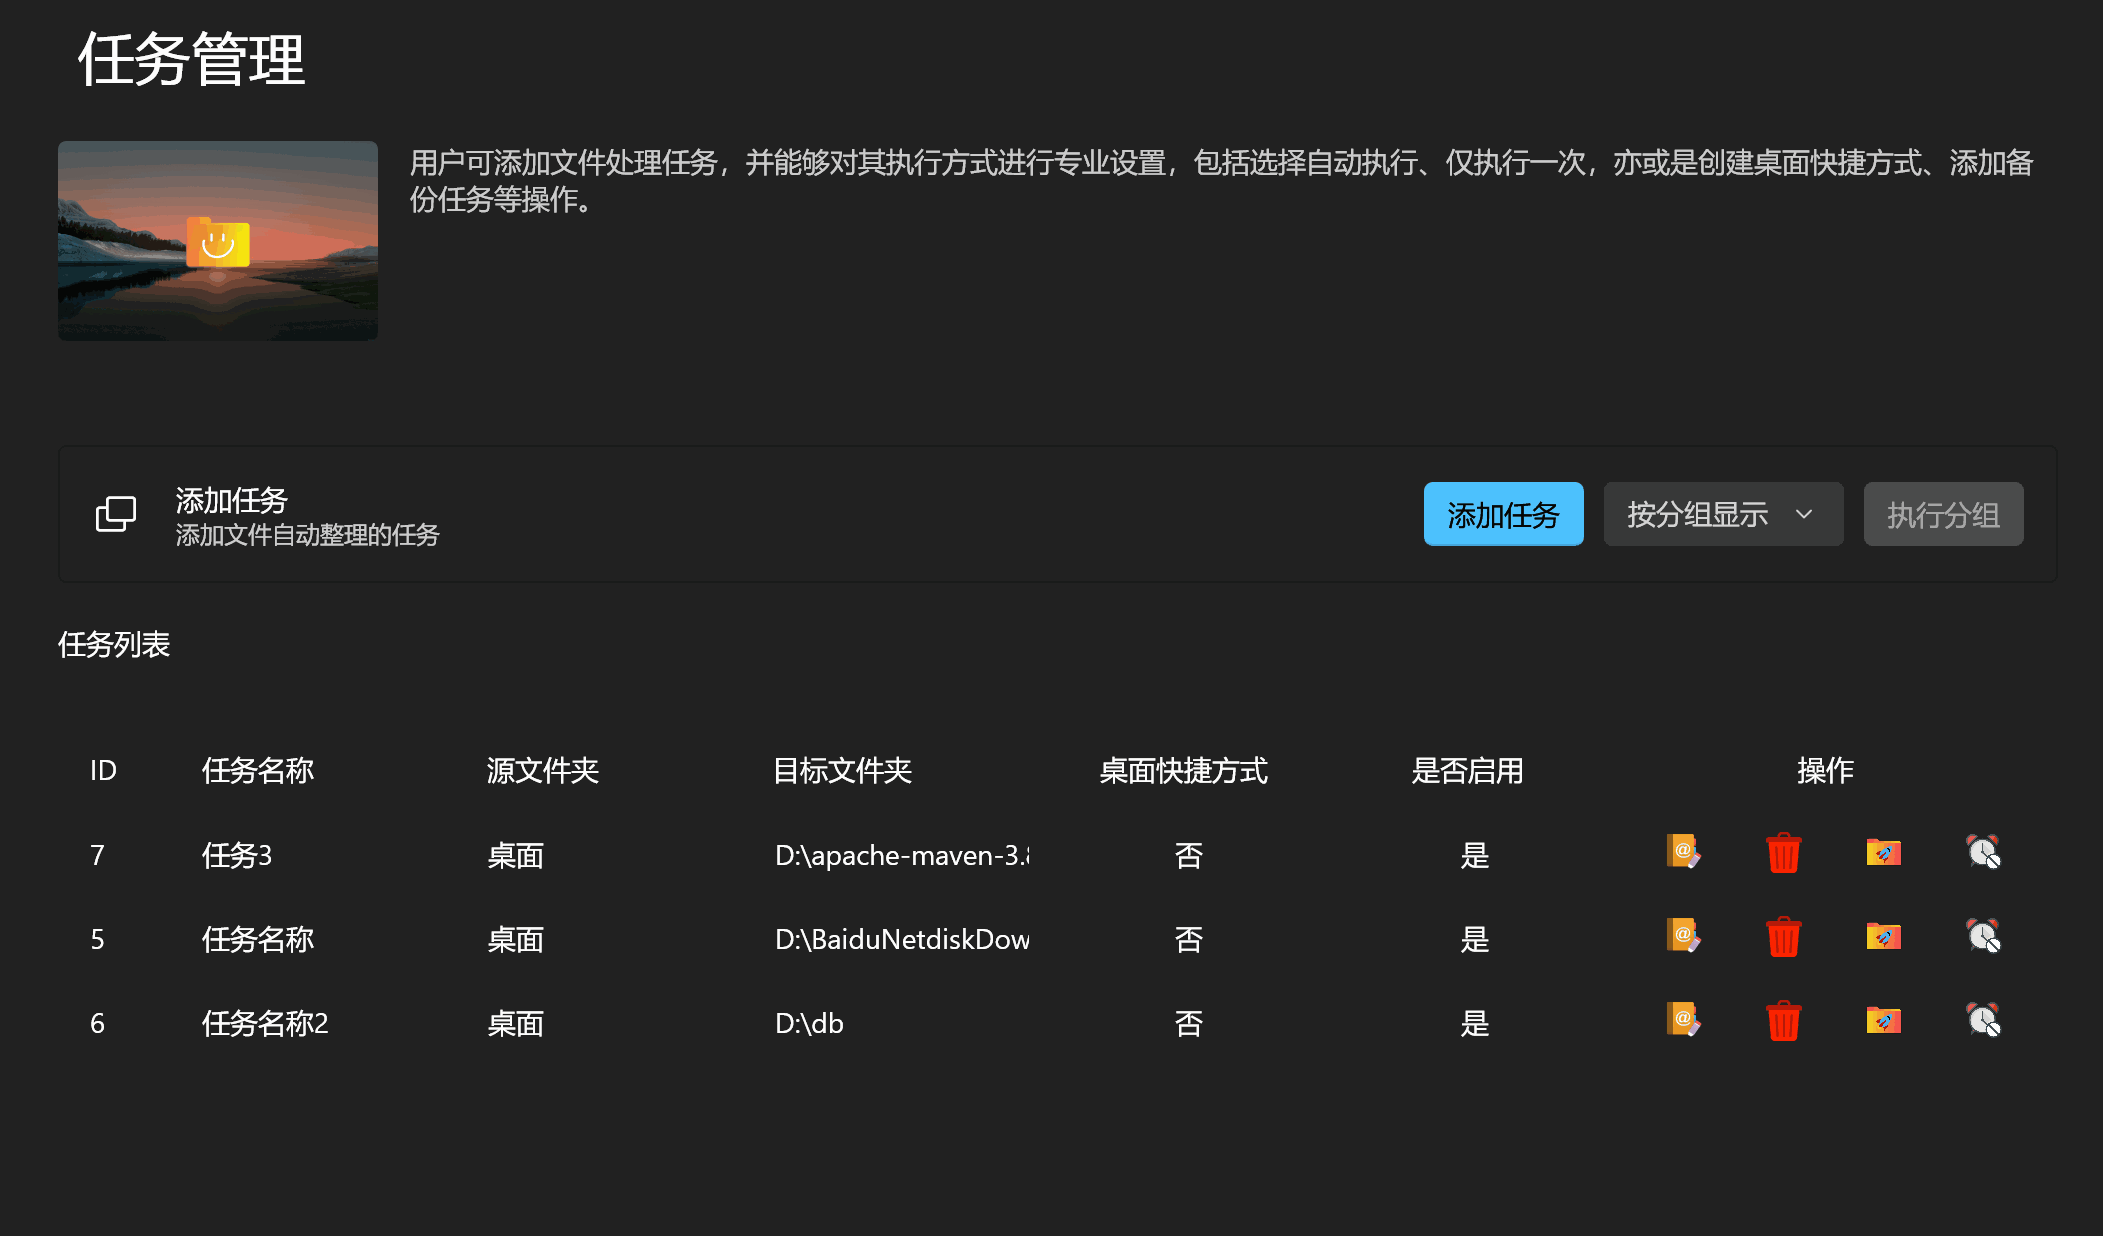
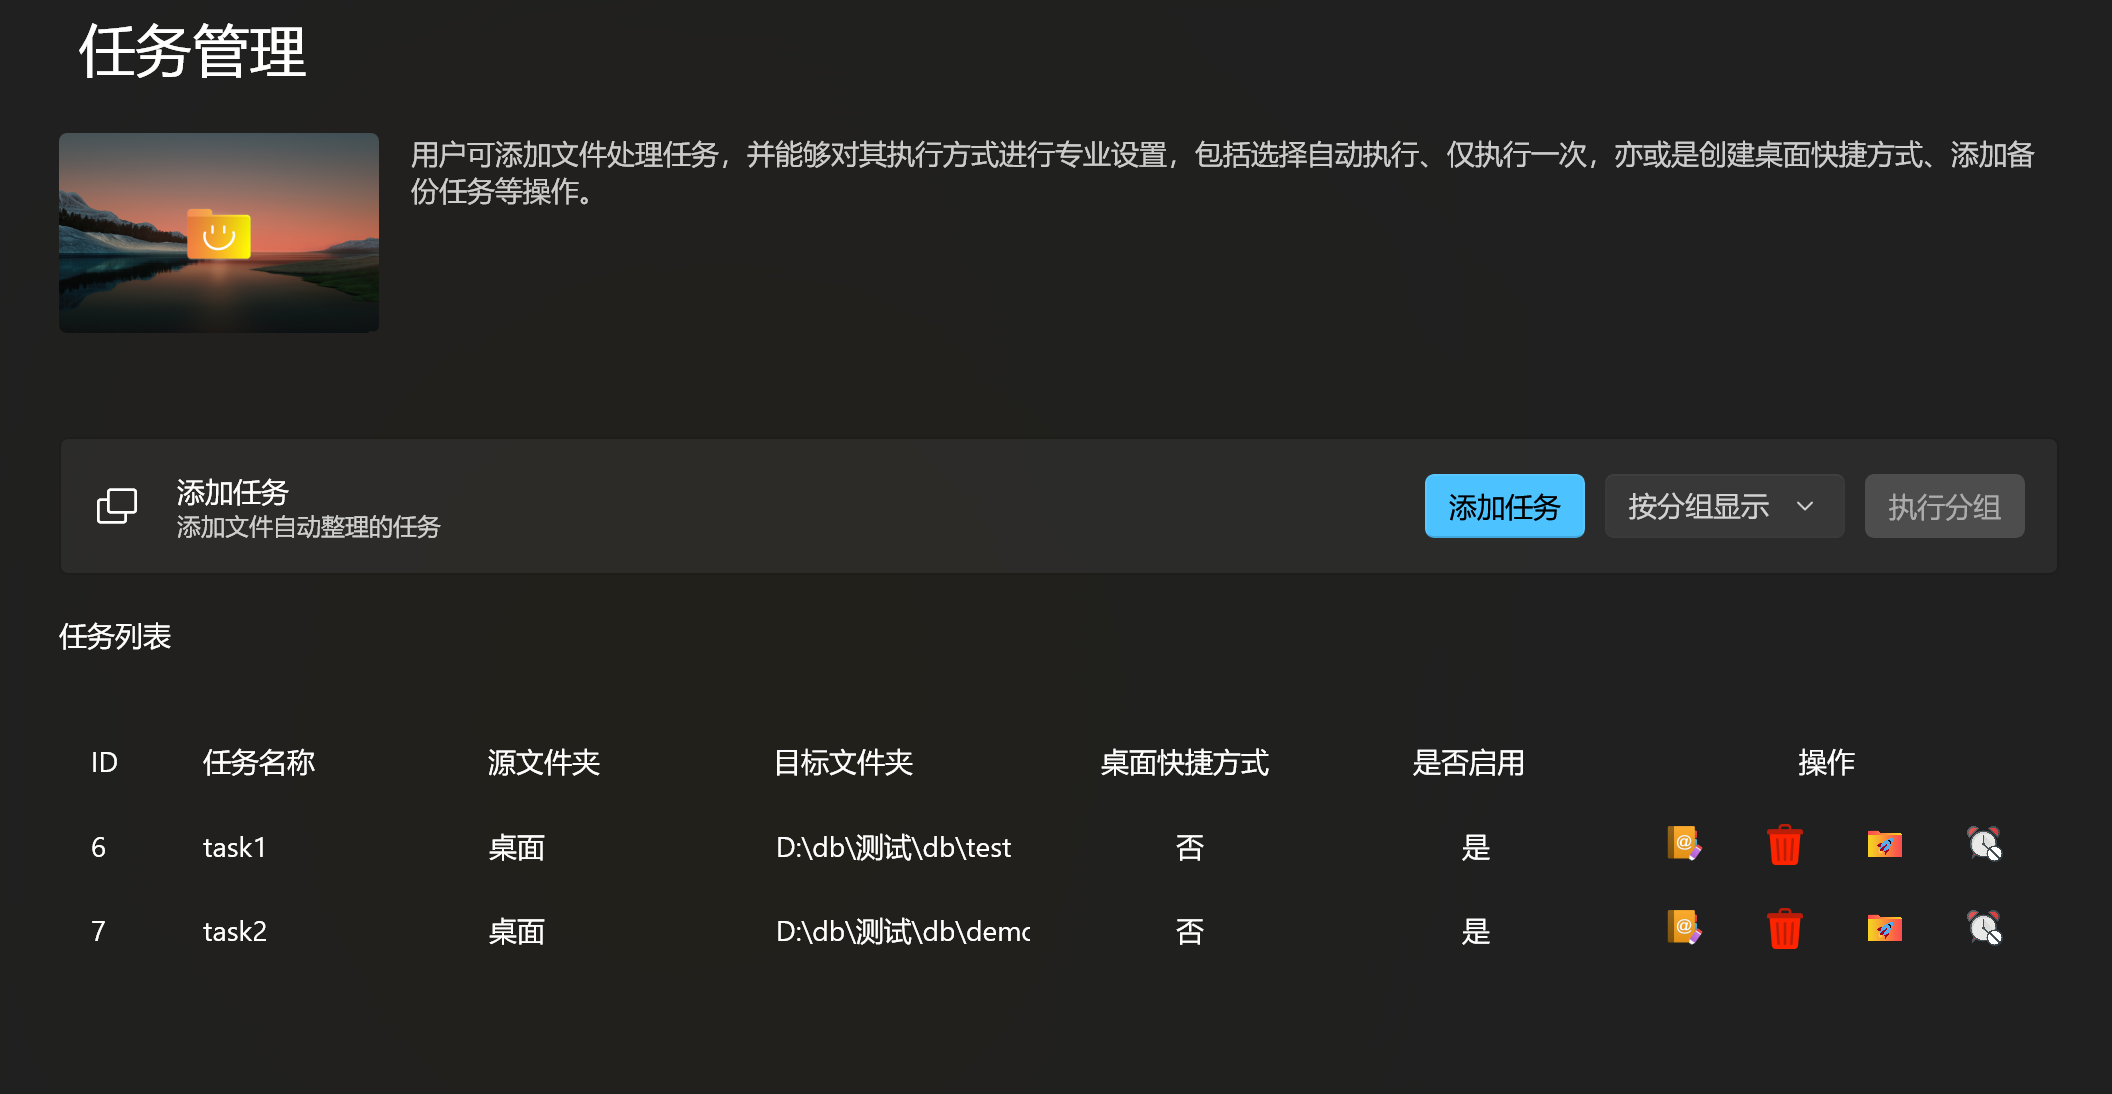
Task List
The task management interface displays all added tasks along with their current statuses. The following operations are supported:
- Manually Execute Task: Immediately trigger the execution of a selected task.
- Enable/Disable Task: Toggle the task's active status, allowing you to control whether the task is running or paused.
- Edit Task: Modify the selected task's name, rules, associated filters, handling methods, and other settings.
- Delete Task: Remove the selected task, including all associated configurations and records.
Group Execution
You can filter tasks by group using the dropdown menu next to the "Add Task" button to easily manage and locate specific task collections. After selecting the desired group, simply click the "Execute Group" button to trigger all tasks within the group at once.